Whenever I photograph I include a gray card that enables me to adjust the color balance later in post-processing. It is not that I always balance the color to a normal setting. Sometimes I prefer the color cast to be more cool or warm. But at least I know what "normal" is and can deviate from there.
The card I carry with me is the
QPcard 101. It is small enough to conveniently fit in a vest pocket or camera bag. The images below show a rather dramatic example of how effective these cards can be.
 |
| I took this photo with available window light very late in the day under exceptionally cloudy conditions. Under such circumstances, colors will normally tend to a heavy blue range. After correction in post processing the colors were restored to normal. |
 |
| Here is a before and after using the QPcard 101. The upper photo shows the results using an auto white balance camera setting. It tends heavily towards a blue cast. In post-processing I clicked on the white or gray area to correct the color to normal. The gray block usually results in a slightly warmer rendering. |
 |
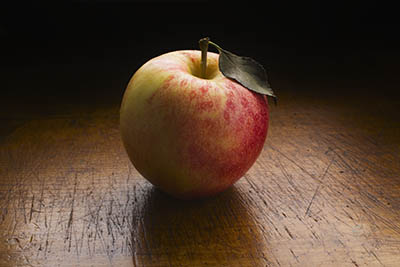
| This is the finished photo. Once I had achieved the correct color balance, I pushed it a bit further to warm it up. |
 |
| Just to show the extent of this color correction method, this image was taken even later in the day using only moon light. The exposure was 10sec at f/8 and ISO400. Under these circumstances the true color was completely skewed. Nonetheless, I was able to easily correct it to normal in post-processing with one click of a mouse button. |


No comments:
Post a Comment